How to Make Fabric Twine From Scraps
Twist two narrow fabric strips into a sturdy cord with nothing but your hands, join new strips without knots, and put the twine to work on gifts, coasters and plants.
Project at a glance
Materials
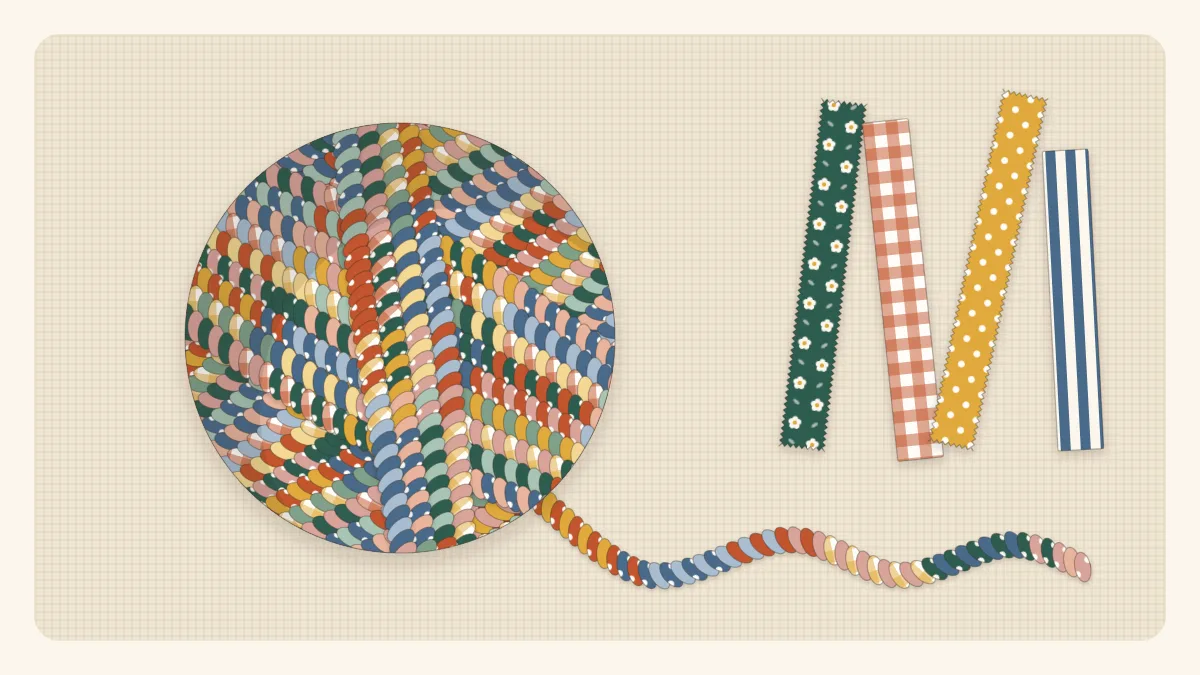
- Lightweight woven cotton or knit strips, about 1 in (2.5 cm) wide
- Scissors
- Clip, clothespin or safety pin to anchor the starting end (optional)
Two narrow strips, two hand movements and no tools beyond scissors: fabric twine from scraps is one of the simplest things a scrap bin can produce. The strips are twisted in one direction and wrapped around each other in the opposite direction, and that opposition is what locks the cord so it does not unravel. Long skinny offcuts, selvages and the trimmed edges of quilt backings are all good candidates, and the finished twine is strong enough for gift wrap, coiled coasters and garden ties.
What you need
- Fabric strips about 1 inch (2.5 cm) wide and at least 8 inches (20 cm) long
- Scissors
- A clip, clothespin or safety pin to hold the starting end (optional but helpful)
Lightweight woven cotton, such as quilting cotton or old shirting, is the easiest to twist. Strips 1 inch (2.5 cm) wide give twine roughly 1/4 inch (6 mm) thick. For a finer cord, use strips 1/2 inch (1.3 cm) wide; for a chunky rope, go up to 1.5 inches (4 cm). Knit strips from old T-shirts also work and give a softer, stretchier cord.
The twist uses up length, so the twine comes out noticeably shorter than the strips that go into it. As a rough guide, allow about one and a half times the length of twine you want in each of the two strands.
Prepare the strips
Strips do not need to be precise. For woven cotton, the quickest method is tearing: make a short snip in the edge, parallel to the grain, and rip. Torn strips have soft, slightly frayed edges that give the twine a rustic look. For a smoother cord, cut the strips with scissors or a rotary cutter and ruler. Pull away any long loose threads before starting.
Mix lengths freely. Short pieces simply mean more joins.
How to twist fabric twine
These directions are written for right-handed twisting. Left-handed makers can mirror them; the only rule is that the twist and the wrap must go in opposite directions.
- Start with uneven ends. Take two strips of clearly different lengths and tie them together at one end with an overhand knot. Starting uneven means the two strands will not run out at the same spot, which keeps the joins staggered and the twine strong.
- Anchor the knot. Pinch the knot in your left hand, or clip it to a table edge or a cushion. Let the two strips lie side by side, pointing to the right, one farther from you and one nearer.
- Twist away. With your right hand, take the strip that is farther from you and twist it away from your body, rolling it between thumb and finger two or three turns until the first inch (2.5 cm) is a firm, round cord.
- Wrap toward. Keeping that twist tight, bring the twisted strip toward you, over the top of the other strip, so the two swap places. Slide your left thumb forward to pinch the crossing.
- Repeat. The untwisted strip is now the far one. Twist it away from you, then bring it toward you over the other. Continue: twist away, wrap toward, pinch.
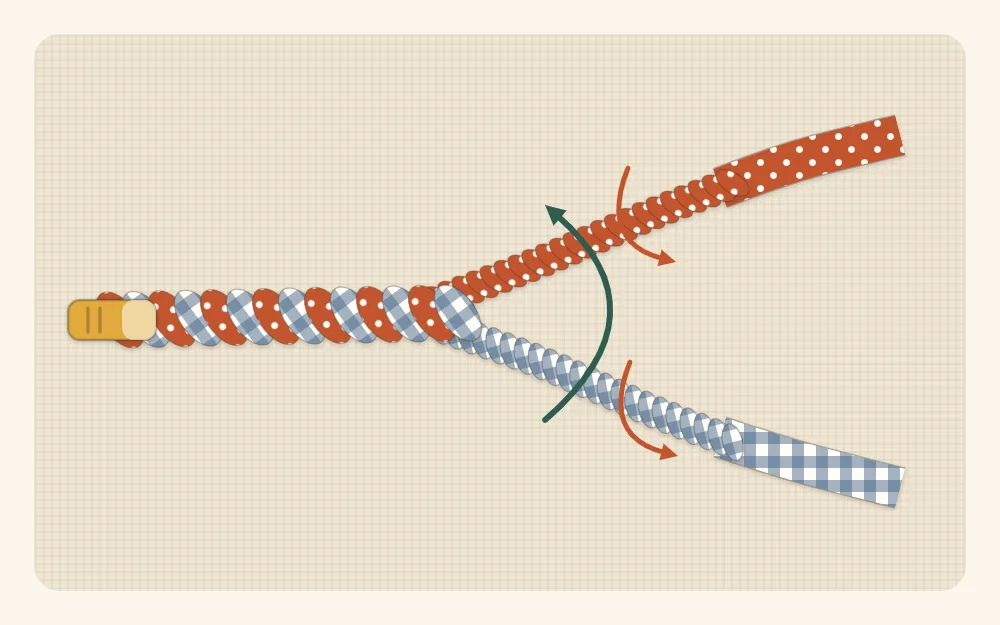
After the first few inches, test the work by letting go. Properly made twine stays put. If it springs apart, the twist and the wrap were going the same way; undo it and reverse one of the two movements.
Tip
Tight, even twists make smooth twine. If the cord looks loose and flat, add an extra turn to each strip before wrapping it over. Folding the raw edges of each strip inward as you twist hides most of the fraying.
How to join a new strip
No knots or stitches are needed to add length. The twist itself holds the join.
- Stop when about 2 to 3 inches (5 to 7.5 cm) of a strip remain.
- Lay the end of a new strip on top of that tail so the two overlap for the full 2 to 3 inches.
- Fold the new strip around the old tail and treat the doubled section as a single strand. Twist it away from you a little more firmly than usual, then wrap it over as before.
- Keep going. Once the overlap has been twisted into the cord, trim any ends that poke out.
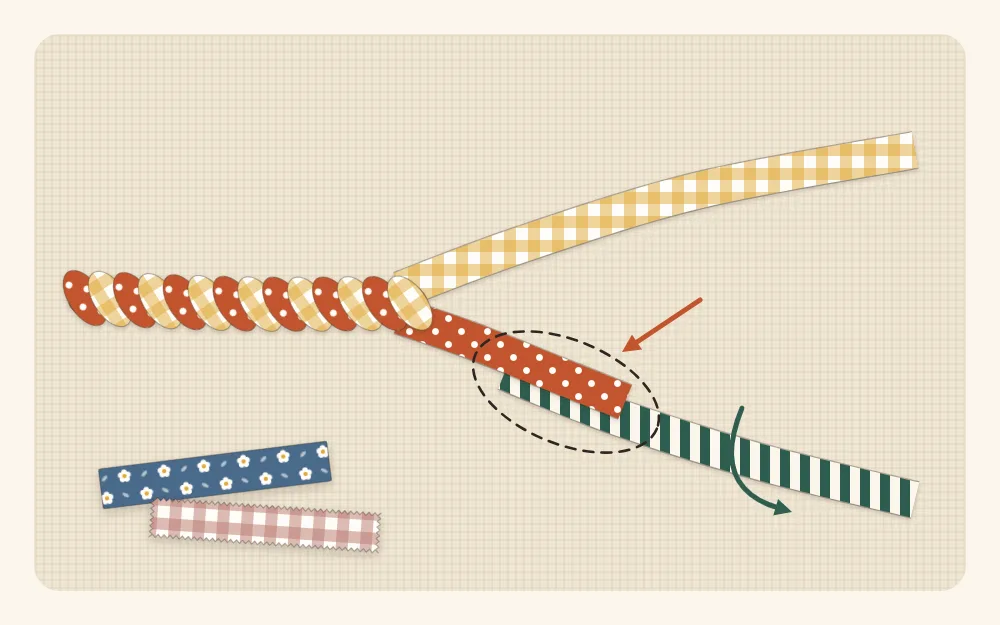
Change colors at every join for a confetti effect, or keep each strand to one color family for a two-tone barber-pole look.
Watch out
Never join both strands at the same point. Two joins side by side make a weak, bulky spot that can pull apart under tension. If both strips are running short together, trim one back by a few inches before adding new pieces.
Finishing and storing
When the twine is long enough, tie both strands together in a firm overhand knot and trim the tails to about 1/2 inch (1.3 cm). Wind the twine into a ball, or wrap it around a piece of cardboard. A ball can be kept going over many sessions: leave the working end secured with a clip and pick it up again whenever a few more strips turn up.
Ways to use fabric twine
Gift wrap
Twine in mixed prints dresses up plain paper, jar lids and tags, and it can be untied and used again. It pairs naturally with cloth wrapping; there are more ideas for presenting handmade presents in the roundup of scrap fabric gift ideas.
Coiled coasters
Coil the twine into a flat spiral and stitch each round to the one before it, either by hand with a whipstitch or by machine with a wide zigzag that catches both rounds. A coaster about 4 inches (10 cm) across takes roughly 1.5 to 2 yards (1.4 to 1.8 m) of 1/4-inch (6 mm) twine. Tuck the final end to the underside and stitch it down. For a flat, quilted alternative, see the fabric scrap coasters tutorial.
Plant ties
Soft cotton twine is gentle on stems. Tie it in a loose figure eight, with one loop around the stake and one around the plant, so the stem has room to grow. Cotton weakens after a season of sun and rain, so check outdoor ties from time to time and replace any that have frayed.
More ideas
- Hanging loops for ornaments and tags
- Handles for small baskets and gift bags
- A string for garlands and bunting
- Drawstrings for simple pouches
Twine-making is also a pleasant no-sew project in its own right; the collection of no-sew fabric scrap projects has several more that use torn strips.
Common mistakes
- Twine that unravels: the twist and the wrap are in the same direction. Twist away, wrap toward.
- Lumpy cord: strips of very different widths or weights were combined. Keep each length of twine to similar fabrics.
- Joins that slip: the overlap was too short. Use at least 2 inches (5 cm) and twist the doubled section firmly.
- Sore fingers: take breaks, and clip the starting end to something fixed so one hand is not doing all the gripping.
Frequently asked questions
Why does my fabric twine unravel?
The twist and the wrap are going in the same direction. Each strip must be twisted one way, away from you, and then wrapped over its partner the opposite way, toward you. That opposition is what locks the cord.
How wide should the strips be for fabric twine?
Strips about 1 inch wide give twine roughly 1/4 inch thick in lightweight cotton. Use 1/2-inch strips for a finer cord and strips up to 1.5 inches for a chunky rope.
How much fabric does fabric twine use?
The twist takes up length, so the twine is shorter than the strips. As a rough guide, allow about one and a half times the finished length in each of the two strands.
Do the joins need to be sewn or knotted?
No. Overlap the new strip with the last 2 to 3 inches of the old one and twist the doubled section firmly. Stagger the joins so both strands never change at the same point.