Scrap Fabric Appliqué for Beginners: The Easy Fusible Method
Raw-edge fusible appliqué turns the smallest print scraps into hearts, leaves and other simple shapes. Trace, fuse, cut, press and stitch around the edge.
Project at a glance
Materials
- Cotton print scraps
- Plain cotton or linen tea towel, prewashed
- Lightweight sewable paper-backed fusible web, about 6 x 8 in (15 x 20 cm)
- Paper and pencil
- Small sharp scissors
- Iron, pressing surface and pressing cloth or parchment paper
- Sewing thread, or six-strand embroidery floss for hand stitching
- Sewing machine or hand needle
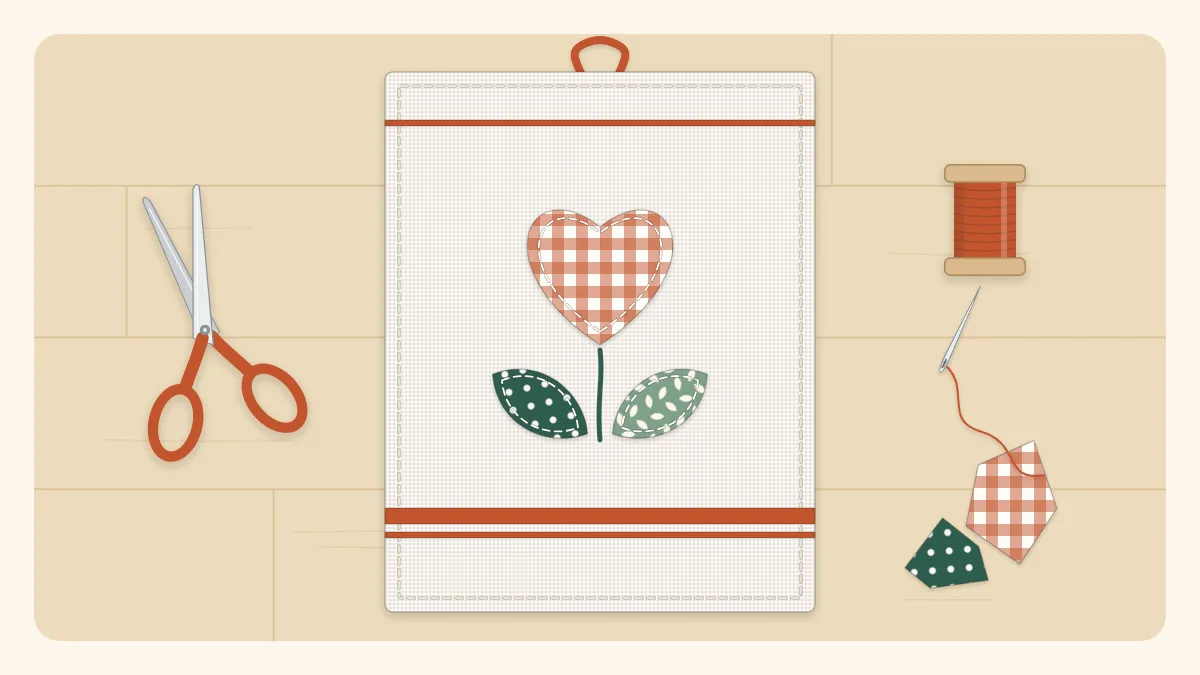
Appliqué means stitching one piece of fabric on top of another to make a picture or pattern. Scrap fabric appliqué is one of the best uses for pieces that are too small or too oddly shaped for patchwork, because a heart, a leaf or a circle can be cut from almost any corner of a print. The raw-edge fusible method described here is the easiest way in: a paper-backed adhesive holds each shape flat, there are no edges to turn under, and a single line of stitching finishes the job. The example project is a tea towel with one heart and two leaves, but the same steps work on tote bags, cushion fronts, bibs and quilt blocks.
Materials
- Cotton scraps: one at least 4 inches (10 cm) square for the heart and two at least 2 x 3 inches (5 x 7.5 cm) for the leaves
- A plain cotton or linen tea towel, washed, dried and pressed
- Paper-backed fusible web, lightweight and sewable, about 6 x 8 inches (15 x 20 cm)
- Paper and a pencil for drawing the shapes
- Small sharp scissors (paper scissors for the web, fabric scissors for the fabric)
- Iron, pressing surface and a pressing cloth or sheet of parchment paper
- Thread to match or contrast, and a sewing machine or hand needle
- Six-strand embroidery floss, if stitching by hand
Watch out
Check the package before buying fusible web. Heavy “no-sew” types are too stiff and sticky to stitch through and will gum up a needle. For a towel that will be washed, choose a web labelled lightweight and sewable, and follow its instructions for iron temperature and pressing time, since these differ from one product to another.
Prepare the fabric and the shapes
Wash the towel and the scraps without fabric softener, which can stop the adhesive from bonding, then press everything flat. Prewashing also removes sizing and lets any shrinkage happen before the shapes are attached.
Draw the shapes on paper first. For this project:
- Heart: about 3 inches (7.5 cm) wide and 3 inches tall. Fold a piece of paper in half, draw half a heart against the fold and cut it out for a symmetrical shape.
- Leaves: two simple pointed ovals, each about 2.5 inches (6.5 cm) long and 1.25 inches (3 cm) wide.
Step by step
- Trace the shapes onto the paper side of the fusible web. Lay the web over the drawings, paper side up, and trace each one with a pencil. Leave about 1/2 inch (1.3 cm) between shapes. The tracing ends up on the back of the fabric, so the finished shape is a mirror image of what was traced. Hearts and plain leaves are symmetrical, so it makes no difference here. Anything with a direction, such as a letter, a number or a bird facing one way, must be traced in reverse.
- Cut the shapes out roughly. Cut each one from the web about 1/4 inch (6 mm) outside the pencil line. Do not cut on the line yet.
- Fuse the web to the wrong side of each scrap. Place the scrap face down, set the web on top with the rough adhesive side against the fabric and the paper facing up, and press with a dry iron for the time given on the package. Press straight down instead of sliding. Make sure no web hangs over the edge of the scrap, where it would stick to the iron or the board. Let it cool.
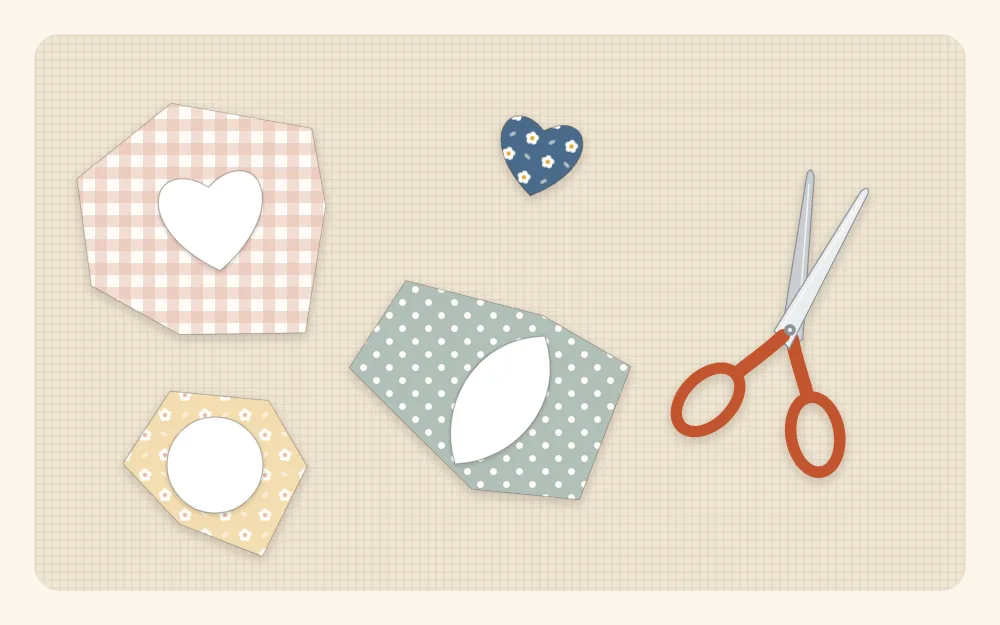
- Cut on the pencil line. With the paper still attached, cut each shape out exactly on the traced line. The paper stiffens the fabric, which makes smooth curves much easier. Turn the fabric into the scissors on curves instead of turning the scissors.
- Peel off the paper. A thin, slightly shiny film of adhesive should stay on the fabric.
- Arrange the shapes on the towel. Place the towel right side up on the pressing surface. Position the heart, adhesive side down, centered across the width with its lowest point about 3 inches (7.5 cm) above the bottom hem. Tuck one leaf on each side, angled outward, leaving a small gap or overlapping the heart by no more than 1/8 inch (3 mm). If shapes overlap, the one underneath goes down first.
- Fuse in place. Cover with a pressing cloth or parchment paper and press for the time on the package, lifting and lowering the iron. Let the towel cool completely before moving it, then check the edges. Press again briefly if any edge lifts.
- Stitch around every edge. Fusing alone will not survive repeated washing. Choose one of the stitches below and sew all the way around each shape.
Stitching the edges
By machine
- Straight stitch: the simplest option. Set a stitch length of about 2 mm and sew 1/8 inch (3 mm) inside the cut edge. The edge beyond the stitching will soften and fray very slightly with washing, which is the look of raw-edge appliqué.
- Zigzag: about 2.5 mm wide and 1.5 mm long. The needle should land just off the appliqué on the right swing and well inside it on the left, so the stitch wraps the edge.
Sew slowly. On curves, stop with the needle down, lift the presser foot, turn the fabric a few degrees and continue. At the point of a heart or leaf, stop with the needle down exactly at the point and pivot. Finish by overlapping the first few stitches, then pull the top thread to the back and knot it.
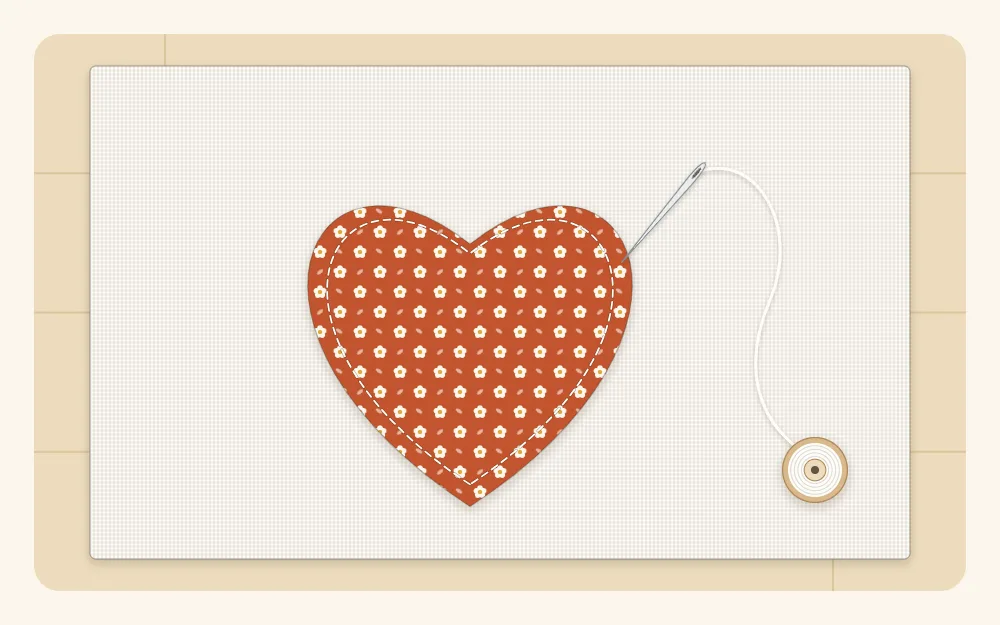
By hand
Use two strands of embroidery floss and a sharp embroidery needle. A small running stitch 1/8 inch (3 mm) inside the edge gives a casual look, and a blanket stitch over the edge gives more protection against fraying.
Tip
Fuse a spare shape to a leftover piece of background fabric and test the stitch on it first. If the stitching puckers the background, pin a piece of tear-away stabilizer or plain paper underneath and tear it away afterwards.
Common mistakes
- The shape came out backwards. It was traced the right way round instead of reversed. Flip directional designs before tracing.
- The shape will not stick. The paper was still on, the iron was too cool, or the fabric had softener residue.
- Adhesive on the iron. The web extended past the fabric, or was placed paper side down. A pressing cloth protects against both.
- A dark background shows through. Pale scraps over a dark or boldly printed base look shadowed. Pick a denser or darker scrap, or fuse a layer of white fabric behind it first.
Variations and where to use it
Circles traced around a spool or a jar lid make an easy scattered-dot design. Print choice matters more than it does in patchwork, since each shape has to stand out from the background; the notes on combining scrap fabric colors explain how to check for enough light-dark contrast.
Because the shapes can be very small, this technique is also one of the answers to what to do with tiny fabric scraps. The heart template can be reused for stuffed fabric scrap hearts.
If appliqué is added to anything for a baby or small child, use fabric shapes only: buttons, beads and similar trims are small parts and are not suitable for children under three.
Frequently asked questions
Does fusible appliqué need to be stitched down?
For anything that will be washed or handled, yes. The adhesive holds the shape in position, but stitching around the edge is what keeps it attached through repeated laundering.
Why do appliqué shapes have to be traced in reverse?
The shape is traced on the paper backing, which is fused to the wrong side of the fabric. When the fabric is turned right side up, the shape is mirrored. Symmetrical shapes such as hearts are unaffected, but letters and other directional designs must be traced backwards.
Will raw-edge appliqué fray in the wash?
A little. The fusible web limits fraying, and stitching about 1/8 inch (3 mm) inside the edge stops it from going further. A zigzag or blanket stitch over the edge gives the most protection.
Which fabrics work best for scrap appliqué?
Tightly woven cottons such as quilting cotton are the easiest, because they cut cleanly, fuse well and fray slowly. Loose weaves and stretchy knits are harder to handle for a first attempt.