Fabric Covered Buttons From Scraps: Kit Method and Gathered-Thread Method
Make fabric covered buttons from the smallest scraps in the bin, using a cover-button kit or a simple gathered-thread method over plain shank buttons.
Project at a glance
Materials
- Light to medium-weight cotton or linen scraps
- Cover-button kit with shells, back plates and setting tool, or plain shank buttons
- Strong thread and a hand needle (gathered method)
- Small sharp scissors
- Pencil or removable fabric marker
- Optional lightweight fusible interfacing
- Card for a viewing window
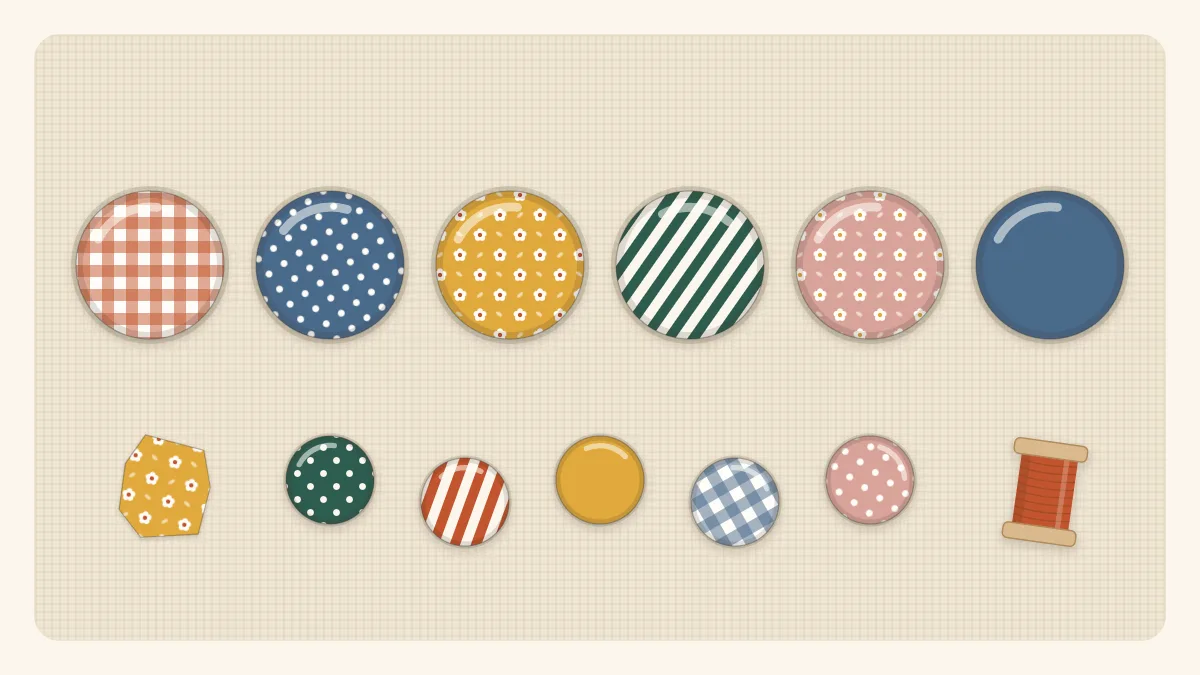
The smallest pieces in the scrap bin, the ones barely bigger than a coin, are exactly the right size for fabric covered buttons. A circle of cloth an inch or two across is all one button takes, and a favorite print that is down to its last corner can end up front and center on a cardigan, a cushion or a hair tie. There are two ways to make them: with a cover-button kit, or by gathering fabric around a plain button with needle and thread.
What you need
- Fabric scraps: light to medium-weight woven cotton or linen is easiest
- A cover-button kit (metal or plastic shells, back plates and usually a small setting tool), or plain shank buttons with a smooth domed top
- Strong thread and a hand needle for the gathered method
- Small sharp scissors, a pencil or removable fabric marker
- Optional: lightweight fusible interfacing for thin or pale fabrics
Watch out
Buttons, shells and back plates are small parts and a choking hazard. Keep them away from children under three, and do not use covered buttons on clothing or toys for that age group.
Choosing fabric and centering a motif
Thin cottons mold smoothly over a button dome. Thick fabrics such as denim, corduroy and upholstery cloth are hard to tuck into the back of a kit button and may stop the back plate from snapping on. Very sheer or pale fabric can let a metal shell show through; fusing a layer of lightweight interfacing to the wrong side, or adding a second layer of plain white cotton underneath, solves that.
Scale matters more than anything. Only the middle of the circle shows on the finished button; the outer ring disappears around the back. Tiny florals, dots, narrow stripes and small checks all work. For a larger print, pick out a single element, such as one flower or one dot, and center it.
A simple viewing window makes centering easy. Cut a hole the size of the button face in a piece of card, then slide the card over the fabric until the hole frames the part you want. Trace the cutting circle around that spot. If your kit includes a clear plastic template, it does the same job.
Method 1: using a cover-button kit
Kits come in standard sizes, commonly from 7/16 inch (11 mm) up to 1 1/2 inches (38 mm). Most include a cutting template printed on the package, which is the most reliable guide to circle size because shell shapes vary. If the template is missing, a circle roughly 1 3/4 times the button’s diameter is a reasonable starting point; make one test button before cutting a whole set.
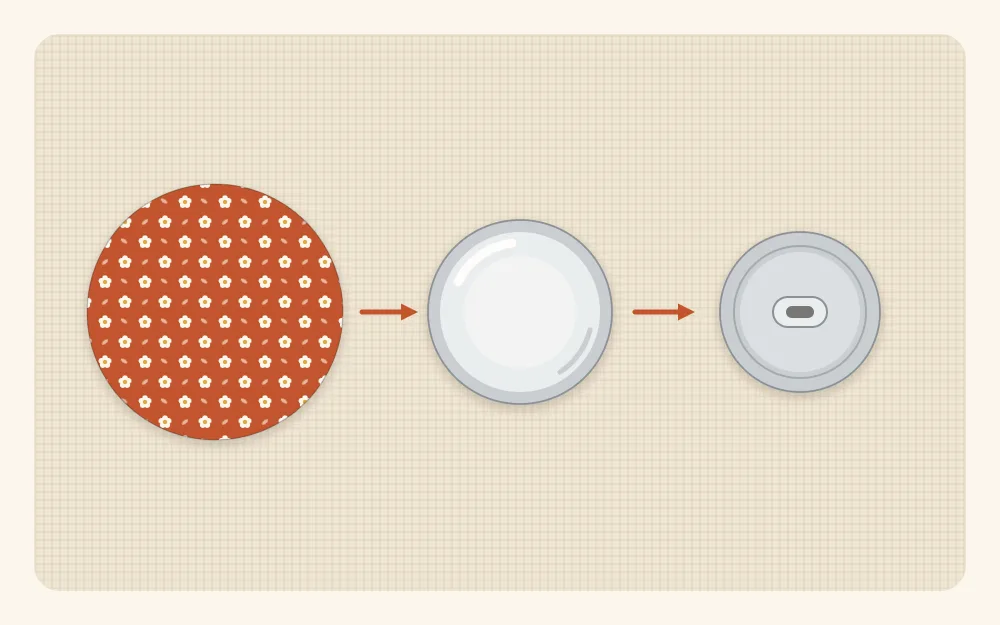
- Cut the circle. Trace the template on the wrong side of the fabric, with the motif centered, and cut on the line.
- Load the mold. If the kit has a soft rubber or plastic mold, lay the circle right side down over it and press the shell, dome down, into the center. The fabric edges should stand up evenly around the shell.
- Tuck the edges. Fold the fabric edges over the rim and into the hollow of the shell. Shells without a mold usually have small teeth around the inside rim: stretch the fabric gently and hook it onto the teeth at 12, 6, 3 and 9 o’clock first, then work around the spaces between.
- Check the front. Before closing, look at the face. The motif should be centered and there should be no pleats visible at the edge. Adjust now; it is difficult afterward.
- Snap on the back. Place the back plate over the tucked edges, shank facing up, and press it down with the pusher tool, or with an empty thread spool, until it clicks into place.
- Remove and inspect. Pop the button out of the mold. Any stray fabric peeking past the back plate can be poked under with a pin.
Tip
Lightly dampening a cotton circle before stretching it over the shell helps it mold to the dome without puckers. Let the button dry before using it.
Method 2: the gathered-thread method for plain shank buttons
No kit is needed for this one. It works on any shank button with a smooth domed or flat top, which makes it a good use for mismatched buttons from the button jar.
Cut the circle about twice the diameter of the button:
| Button diameter | Fabric circle diameter |
|---|---|
| 1/2 inch (13 mm) | 1 inch (2.5 cm) |
| 3/4 inch (19 mm) | 1 1/2 inches (3.8 cm) |
| 7/8 inch (22 mm) | 1 3/4 inches (4.5 cm) |
| 1 1/8 inches (29 mm) | 2 1/4 inches (5.7 cm) |
| 1 1/2 inches (38 mm) | 3 inches (7.6 cm) |
A very thick or high-domed button may need a slightly larger circle.
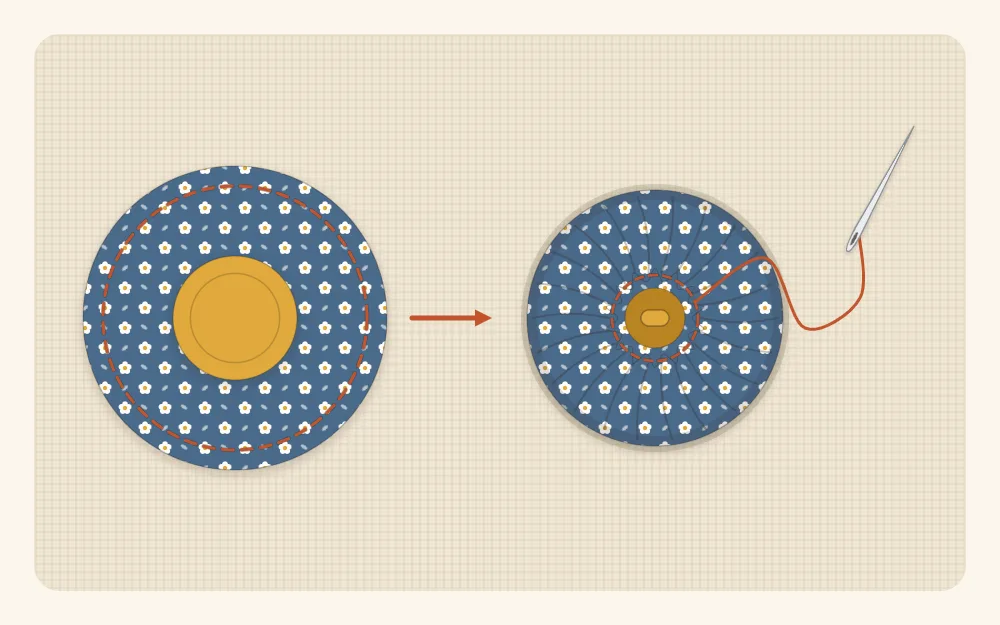
- Thread a needle with strong thread, doubled, and knot the end.
- Sew a line of small running stitches all the way around the circle, about 1/8 inch (3 mm) from the edge. Start and finish on the right side of the fabric so the thread tails are easy to reach. Do not cut the thread.
- Place the button face down in the center of the wrong side of the circle.
- Pull the thread to gather the fabric up around the button until it closes tightly around the shank. Check the front and shift the fabric to center the motif.
- Take several stitches back and forth across the gathered fabric, from one side of the shank to the other, pulling each one tight. This flattens the gathers and locks the cover in place.
- Finish with two or three small knots hidden in the gathers and trim the thread.
Common mistakes
- Circle too large. Extra fabric bunches at the back and keeps a kit’s back plate from seating. Trim 1/16 inch (2 mm) at a time until it fits.
- Circle too small. The edge will not reach the teeth or will pull out of the gathers. Recut rather than forcing it.
- Pleats on the rim. The fabric was tucked in one direction only. Work in opposite pairs, as when tightening the wheel nuts on a car, to spread the fullness evenly.
- Off-center motif. Use the card window before cutting and check again before closing.
- Fraying edges. Loose weaves can unravel while being handled. A layer of fusible interfacing on the back steadies them.
Ways to use fabric covered buttons
- Hair ties. Thread a thin hair elastic through the shank and loop it through itself. A button of 7/8 inch (22 mm) or larger sits best. For a full-fabric alternative, see the scrap fabric scrunchie.
- Magnets and pushpins. Remove the wire shank from a kit back plate with pliers before assembling (many plates let it pull straight out), then glue a flat magnet or a flat-head thumbtack to the back with strong craft glue.
- Cushion centers. Sew one large covered button through the middle of a cushion, pulling the thread firmly to make a tuft, with a second button on the back to anchor it. It pairs well with a patchwork cushion cover.
- Finishing touches. A covered button makes a neat closure or decoration on a scrap fabric glasses case, the center of a pincushion, or a replacement for a lost cardigan button.
Frequently asked questions
How big should the fabric circle be for a covered button?
For a cover-button kit, use the cutting template printed on the package, since shell shapes vary between sizes and makers. Without a template, start with a circle about 1 3/4 times the button's diameter and make a test button. For the gathered-thread method over a plain shank button, cut the circle about twice the button's diameter.
Can fabric covered buttons be made without a kit?
Yes. Sew a running stitch about 1/8 inch from the edge of a fabric circle, place a plain shank button face down in the center, pull the thread to gather the fabric around the shank and stitch back and forth across the gathers to secure them. It works on any shank button with a smooth top.
What fabric works best for covered buttons?
Light to medium-weight woven cotton and linen are the easiest because they mold smoothly over the dome and tuck neatly into the back. Thick fabrics may prevent a kit's back plate from snapping on, and sheer fabrics may need a layer of lightweight interfacing so the shell does not show through.
Are fabric covered buttons washable?
They can usually be washed gently, but metal shells may rust if they stay damp. For items that are laundered often, plastic shells or the gathered method over a plastic button are a safer choice, and delicate fabrics are better hand washed.